Pages

Showing posts with label online courses. Show all posts

Thursday, 15 August 2013

Art that Sells - weeks 4 and 5

Hi Everybody

I hope that this posting finds you all well. It has been great to have the time to create so many blog posts. The summer holidays are racing by.

As promised, here are the two final assignments of the Lilla Rogers Make Art That Sells e-course. 

In week 4, we were asked to produce a piece of wall art. It  had to have very specific colours and the starter activity was to gather collections that demonstrated those colour combinations. This was a fun activity.


Over the course of that week, I produced my canvas using these colours. This was a definite challenge for me. I have to admit using these colours together was not a natural thing for me, though I did warm to them in the end. I also used stamping techniques on the canvas to create texture. This was also a first for me but I was pleased with the end results.


The only thing that I would change about this painting is the text. I don't usually use text on an image, as I like people to look at my paintings and make up their own minds about its subject matter. On review, I am going to remove the text and I will post the results at a later date. It was really interesting to look into the wall art market, and to think about the type and styles of work that people will buy to place in frames and hang.

As a side line to the painting, I created three collages. Originally they were going to be part of the painting and although I didn't use them in the end, I do like them and may make some more for another project. With art, nothing is ever wasted!


In week 5, the last week of the course, we were asked to create a 'lush' design that could be used on a range of gifts. The starter activity was to create images of our personal collections. I think I have mentioned before on this blog that I have a big passion for fossils, minerals and natural forms, so I produced drawings and photographs from my collection.


At this stage, I wasn't quite sure how to interpret a 'lush' design but I then came up with the idea of inserting my fossil drawings into images of bottles I have also collected and this created a busy, colourful design. To do this, I had to use Photoshop and Illustrator, the effect is certainly very different than my normal use of drawing and paint.

Here's a section of my final design. 


It was great to do something different and fascinating to read the enormous amount of information provided by Lilla. 

In respect of the course I found it very challenging, as several of the assignments were outside of my normal area of expertise, but I enjoyed being stretched out of my comfort zone. I am now able to view art in a much larger picture seeing it applied to the variety of goods for which Lilla Rogers is an agent. If any of you want to make art to sell, I cannot recommend this course enough. Each area of the market place is thoroughly covered by examples, interviews and contacts. Mind-blowing information from which I have gained so much. Thanks to Lilla and Beth for this amazing course.

I hope that you have found this interesting. I will post again soon with the latest developments from the Man Cave.

Andy


Monday, 12 August 2013

A Splash of Paint

Hi Everyone

As well as seeking out unusual items for the 2013 Scavenger Hunt, I have started painting again. YIPPEE! There is nothing better than to splash a bit of paint around or take a pen to paper.

I thought that you might like a glimpse of some sections of the paintings that now grace the 'Man Cave' (aka the Garage) which is my new messy studio space.


I will start with the paintings that only have a couple of layers so far. Above shows a layer with fluorescent paint. I am rather hesitant to use it that much as it is a powerful colour, but as Flora Bowley said when I took her Bloom True course, be brave!


I have a few ideas where these paintings will be going but that's for another post.

There are also several larger canvases on the go about which I am quite excited. Here are sections of these.


All these paintings have multiple layers and contrast, so now it is up to me to trust my instincts in order to complete them.

I hope you all are having a creative summer?

Back soon.

Andy

Wednesday, 26 June 2013

Week 3 of Making Art that Sells

Hi everyone

Last week, I had an enormous amount of fun working on an assignment where we were given a task to illustrate Hans Christian Andersens, 'The Snail and the Rose Tree'. This is a short story, with the moral story-line: never give up on personal achievement. How relevant! It was a great challenge as I have always wanted to illustrate a book.


This is my final piece. Everything was hand drawn using pens, pencils, watercolours, or painted with acrylics and then scanned and collated in Illustrator.

At the beginning of the process, I developed the two main characters, and I hope you can see the amount of pleasure I had with this assignment through the amount of drawings and sketches I made that covered the kitchen table... and floor? It was an organised mess!

I started the drawing process by looking at the snail and trying to get his character right. He was the hardest for me because I wanted to make him look  'cute' but not loose the shape and character of a normal snail. Below are some of my sketches that did not make the cut.


I have to admit the Blue snail almost made it to the front cover. I feel he is a very jolly little fellow. But, this was before I had read the storyline. He looks too happy and needs to be more grumpy.


Next are the sketches for the border. When we were asked what was our favourite children's book, I immediately knew mine from childhood. The Riverbank Rumpus by Simon Joyner. The detail and quirky little characters really inspired the way my cover developed. The idea for the border was that in the story, the garden is surrounded by hazel bushes, so these sketches are what created the edging on the book cover and they would be inhabited by some little characters that might not be seen at first glance. Look out, there are four of them hiding around.
                                                                                                   

I hand painted my background using techniques I had developed on the Flora Bowley course (which you can see in a previous post here) and then the final pieces were: the writing (which is a whole post in itself) and the rose tree with the bushy eyebrows. He was the one I had the most fun designing and I hope to develop him further in future projects.


I hope I achieved the rose tree character to look thoughtful and wise but not too scary for a children's book. I love how his character evolved from bushy eyebrows to hairy ears. He makes me smile every time I look at him! I really had tremendous fun in creating this book cover and could visualize a whole book. Maybe one day? Now I must look to this week challenge of orange and green... that I will post about next time.  

Last weeks challenge, I feel, has really brought out more of my personality in the use of different art mediums, rather than just through ink and pen. Thank you Lilla Rogers. Your amazing input and encouragement is bringing out the best in all artists on your course. I cannot speak highly enough about Make Art That Sells. This course is really showing me that by using stepping stones I can achieve my goals.    


I can't wait to have a spare moment to catch up with my fellow bloggers. I have slightly got behind. Sorry.

Until the next time, have a good week. 

Andy

Monday, 17 June 2013

Making Art That Sell

Hello everybody

I have been very fortunate to find myself on the e-course 'Make Art that Sells' run by Lilla Rogers, who is an Art Agent Extraordinaire. 

Last week was week two and with the fantastic support of my wife, I have managed to find the time to complete two great assignments.

The course is about helping you to develop your work ready to use in a commercial market.


The first assignment was to develop a vintage kitchen style fabric


I used my own photographs and drawings to help influence the final outcome.


I have not drawn like this for a long time so it was a great exercise.

Assignment Two was to design a set of plates. This was a bit more difficult, but here is the final result.


I would love to know what you think? 

Time for me to start Rinda's 2013 scavenger hunt and the third class assignment commences this week. All I know is that it is book illustration; can't wait!

Busy times ahead at school also as the end of term exams and ofsted (again) are looming.

Take care and I promise to be back soon with a glimpse of this week's assignment about which I am very excited. Can you tell? 

Andy

Monday, 26 November 2012

The story of a canvas ...

Hello everyone,

Another canvas finished. Hurrah! After weeks of being unwell, work piling up and a visit from Ofsted (!), I have finally managed to spend sometime with my paintbrushes. As promised, here is the story of Canvas 3 from start to finish. The painting is now titled 'On the Forest Floor'.


The First Layer
The Second Layer 
The Third Layer 
The Fourth Layer - Black and White.
In the process of outlining the ferns.
The Fifth Layer - Adding imagery and warmth too. 
The Sixth Layer - Adding warmth

the final stages of
'On the Forest Floor'

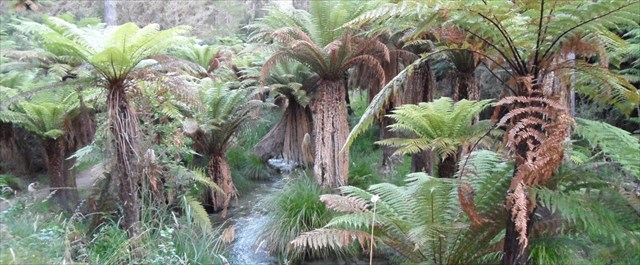
I had great fun creating this canvas and while painting it, did not really think about the imagery that I was using. Now it is complete, I can see that my teenage travels to New Zealand must have penetrated into my subconscious. When I was in New Zealand, I was fascinated by their prehistoric forests. I have included an image found on Google to give you an idea of what they look like.


This has been a fascinating journey for me and well of out my usual comfort zone and style of painting. I hope you have enjoyed being on the journey with me.

Wishing you a very creative week.

Andy

Wednesday, 31 October 2012

On All Hallows' Eve

Happy Halloween Everyone!


Even though my wife and I are not American, we have certainly got into the Halloween spirit this year. Being us, we did not want to do a run of the mill Halloween. We wanted it to be a bit art and crafty and we were inspired by taking Margie Rommney-aslett's, Spooky Spark 3 day workshop.

Margie talked about decorating your home and mantle with all sorts of small, spooky, fun filled projects, which I have to admit were great fun... The only problem was, we do not have a mantle so used the landing window instead.


The Nieces and Nephews get a little crafty treat this year, each one 'chock' full of treats 
(excuse the pun!)


They even get glow in the dark stickers, cookies, straws and a giant fluffy spider each!

I also managed to get my hands messy. Horrah! Using Mod Podge and an old book I decorated a paper mache skull from my local craft store


I have nick-named him Boni, from a character in a TV show I used to watch as a child, called Trapdoor. But, that is not all, the spider from that show also made an appearance this year       
  
I saw this giant paper spider and could not resist him

And I just couldn't resist picking up a Sharpee pen and drawing this Raven in my sketchbook.

        
I hope you all have a Spook-tacular Halloween. Be back soon! 

Andy